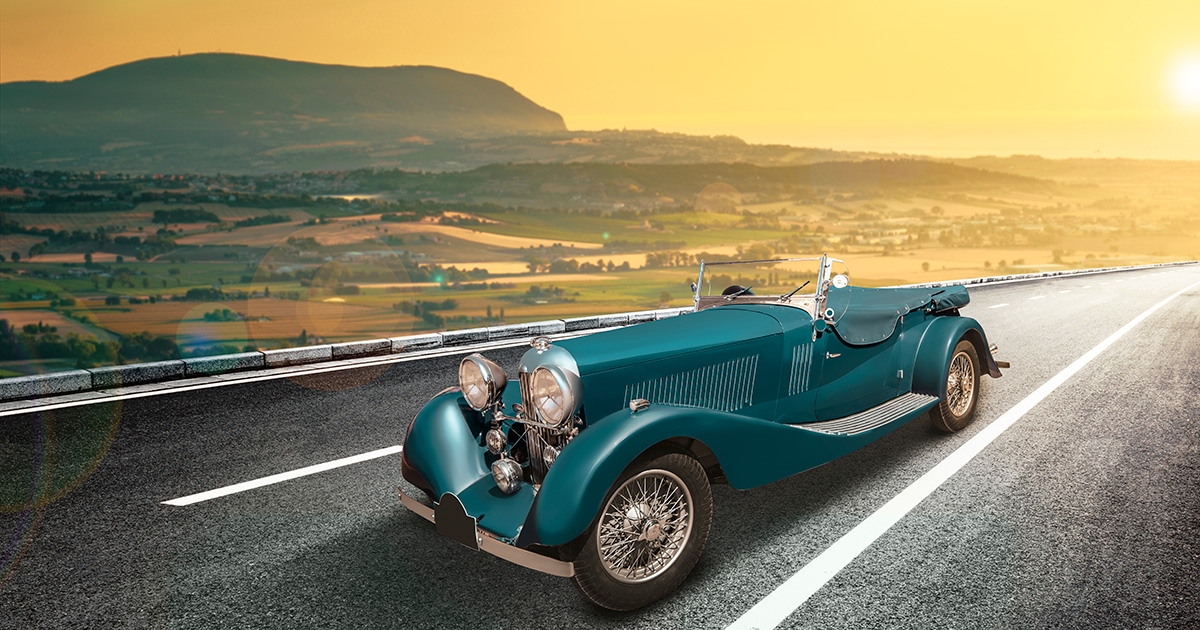
Introduction: The appeal of vintage cars
Vintage cars have an undeniable charm that captivates car enthusiasts and collectors alike. There’s just something about the sleek lines, the timeless design, and the nostalgic feel of these classic automobiles that make them truly irresistible. But what if you stumble upon a rusty relic? A forgotten gem waiting to be restored into a showstopper? In this blog post, we’ll take you on a journey from rust to glory as we explore the art of refurbishing a classic vintage car. Buckle up and get ready for an exhilarating ride!
Step 1: Selecting the right car to refurbish
When it comes to refurbishing a classic vintage car, the first step is crucial: selecting the right car to work on. This decision sets the foundation for your entire restoration project and can greatly influence its success. But how do you choose the perfect vehicle?
Consider your personal preferences and interests. Are you drawn to sleek sports cars or elegant sedans? Do you have a particular affinity for a specific era or brand? Selecting a car that aligns with your taste will ensure that you enjoy working on it and feel proud of the final result.
Next, assess the availability of parts and resources for your chosen make and model. Some cars may be more difficult to find replacement parts for, which can significantly impact both cost and timeline. It’s wise to research beforehand so that you don’t encounter any unexpected surprises later on.
Additionally, take into account practical factors such as budget, space available for storage or workshop area, as well as your level of expertise in automotive restoration. If this is your first project, opting for a simpler vehicle might be wise before taking on more complex restorations down the road.
Consult with experts in vintage car restoration or join online communities where enthusiasts share their experiences. Their insights can provide valuable guidance when making your final decision.
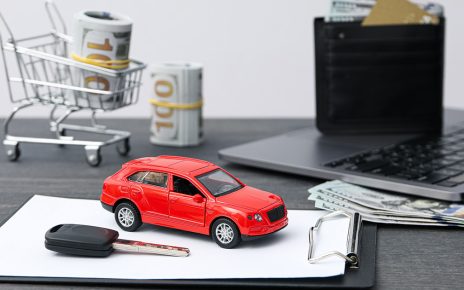
Step 2: Creating a budget and timeline
Creating a budget and timeline is a crucial step in refurbishing a classic vintage car. It helps you stay organized, set realistic expectations, and ensure that the project doesn’t spiral out of control.
First, assess your financial situation and determine how much you can afford to spend on the restoration process. Be sure to factor in not only the cost of purchasing the car but also the expenses for parts, materials, labor, and any unforeseen repairs.
Next, establish a detailed timeline for the project. Consider your availability and resources when setting deadlines for each stage of the restoration process. This will help you stay on track and avoid unnecessary delays.
Remember to be realistic with both your budget and timeline. Classic car restorations can often take longer than expected due to unforeseen challenges or sourcing hard-to-find parts. It’s better to give yourself some leeway rather than rush through the project.
Once you have determined your budget and outlined your timeline, stick to them as closely as possible. Keep track of all expenses along the way so that you can make adjustments if necessary.
By creating a well-defined budget and timeline from the outset, you’ll have a clear roadmap for restoring your vintage car while keeping costs under control. Stay focused on these guiding principles throughout the entire process!
Step 3: Assessing the condition of the car
Step 3: Assessing the Condition of the Car
Now that you’ve found the perfect vintage car to refurbish, it’s time to take a closer look at its condition. This step is crucial in determining the extent of restoration work needed and estimating costs involved.
Start by thoroughly inspecting both the exterior and interior of the car. Look for any signs of rust, dents, or damage on the body panels. Don’t forget to check undercarriage components like suspension and exhaust systems. It’s essential to have a clear understanding of what needs repairing or replacing.
Next, examine the engine and mechanical components. Check for leaks, worn-out belts or hoses, as well as any signs of poor maintenance. Take note if there are missing parts or if they need rebuilding.
Assessing electrical systems is equally important; faulty wiring can cause various issues down the line. Test all lights, switches, gauges, and ensure everything is functioning properly.
Additionally, evaluate the overall structural integrity of the car. Pay attention to frame alignment and any potential structural damage from accidents or corrosion.
By conducting a thorough assessment during this stage, you’ll be able to create a detailed plan for your restoration project – ensuring that every aspect gets addressed appropriately within your budget constraints
Step 4: Planning the restoration process
Step 4: Planning the Restoration Process
Planning is a crucial step when it comes to restoring a vintage car. It’s like mapping out your journey before you set off on an adventure. So, grab your pen and paper, because it’s time to create a plan that will transform your rusty relic into a showstopper.
Take stock of what needs to be done. Assess the condition of each component and create a checklist. This way, you can prioritize tasks and ensure nothing gets overlooked.
Next, determine which parts can be refurbished or repaired versus those that need to be replaced entirely. Research reputable suppliers who specialize in vintage car parts – they’ll become your best friends during this process!
Consider creating a timeline for each stage of the restoration project. Break it down into manageable chunks so that progress feels tangible and achievable.
Don’t forget about budgeting! Set aside funds for materials, labor costs (if applicable), unexpected expenses, and any additional tools you may need along the way.
Remember to factor in extra time for unforeseen challenges or delays – they are bound to pop up during such intricate work.
Don’t underestimate the value of seeking guidance from experts or joining online communities dedicated to classic car restoration. Their knowledge and experiences can provide invaluable insights throughout your journey.
By diligently planning this intricate process ahead of time, you’ll have a clear roadmap towards transforming your vintage car from dusty relic to jaw-dropping showstopper!
Step 5: Finding the right parts and materials
Step 5: Finding the right parts and materials
When it comes to refurbishing a classic vintage car, finding the right parts and materials is crucial. After all, you want your car to not only look good but also perform at its best. But where do you start?
First, research is key. Dive into forums, online marketplaces, and local suppliers who specialize in vintage car restoration. Connect with fellow enthusiasts who can offer insights and recommendations on reputable sources for authentic parts.
Next, make a list of the specific components you need for your particular vehicle model. From engine parts to body panels to interior upholstery, having a clear idea of what you require will help streamline your search.
Nowadays, there are many online platforms dedicated to vintage car enthusiasts that offer an extensive selection of rare and hard-to-find parts. You might even stumble upon auctions or classified ads that have hidden treasures waiting to be discovered.
Don’t forget about salvage yards or junkyards as well; they can sometimes hold unexpected gems among their piles of forgotten vehicles. Just remember that patience is key when sifting through these treasure troves.
Consider reaching out directly to manufacturers or specialty shops that focus on reproducing vintage car parts. They may have painstakingly recreated pieces using original specifications or found alternative solutions for discontinued items.
Finding the right parts and materials may take time and effort but rest assured it will be worth it in the end when you see your once rusty relic transform into a showstopper on wheels! So roll up those sleeves and let’s continue our journey towards restoring that classic beauty!
Step 6: Restoring the exterior of the car
Step 6: Restoring the Exterior of the Car
When it comes to refurbishing a classic vintage car, restoring its exterior is like giving it a fresh coat of charm and allure. The process involves bringing back its original glory while adding a touch of modern sophistication.
First things first, start by removing any rust or corrosion that may have accumulated over the years. This can be done using various techniques such as sandblasting or chemical treatments. Once the surface is clean and bare, it’s time to address any dents or scratches. Gentle massaging and careful filling will ensure that every imperfection disappears seamlessly.
Next, select the perfect paint color for your beloved vintage ride. Whether you opt for an authentic shade from when the car was originally manufactured or want to go bold with a custom hue, make sure to choose high-quality automotive paint that will withstand the test of time.
Once you’ve got your paint in hand, take your time to apply multiple coats evenly. Don’t rush this step – patience is key! After each coat dries completely, gently wet sand it for a smooth finish before applying another layer.
To complete the transformation, don’t forget about polishing and waxing your newly painted bodywork. This will give it an irresistible shine that is bound to turn heads wherever you go.
Restoring the exterior of a classic vintage car requires dedication and attention to detail but seeing those sleek lines come alive again makes all the effort worthwhile! So roll up your sleeves and get ready to witness how transforming rusty relics into showstoppers can be pure magic!
Step 7: Revamping the interior
Step 7: Revamping the Interior
The final step in refurbishing a classic vintage car is revamping the interior. This is where you can truly transform your rusty relic into a showstopper. The interior of a vintage car not only adds to its overall aesthetic appeal but also plays a crucial role in providing comfort and functionality.
When revamping the interior, start by thoroughly cleaning all surfaces and removing any old upholstery or carpeting. Evaluate what needs to be repaired or replaced, such as cracked dashboards, worn-out seats, or faded trim. Consider upgrading components like the steering wheel or adding modern conveniences like air conditioning while still maintaining the vintage charm of the vehicle.
Carefully choose materials that are appropriate for an authentic restoration, such as period-correct fabrics and vinyls. Pay attention to details like stitching patterns and colors that match the original design of your car’s make and model.
For those who want to take it a step further, consider customizing elements of the interior to reflect your personal style. Adding unique touches like embroidered seat covers with personalized designs can truly make your refurbished vintage car one-of-a-kind.
Throughout this entire restoration process, remember that patience is key. Rome wasn’t built in a day—and neither was your dream classic car! Take your time with each step and focus on achieving quality craftsmanship rather than rushing through it.
In conclusion (without using “in conclusion”), refurbishing a classic vintage car requires careful planning, dedication, and attention to detail—but it is undoubtedly worth every effort when you see how an old rust bucket can be transformed into an absolute masterpiece!
So whether you’re restoring for personal enjoyment or aiming for awards at prestigious auto shows—have fun along the way! Embrace challenges as opportunities for growth and learning because ultimately it’s about preserving automotive history while creating something extraordinary from scratch.
Now go out there and unleash your inner mechanic-artist… Happy restoring!